Plus Quilt Along Week 3

Tuesday, May 7, 2024

Welcome to week three of the Plus Quilt Along! I'll be updating the Sew Along Page each week with all the posts so that you can easily catch up or reference these posts after the sew along ends!

I hope you'll sew along with us! Sew from the tutorial or the pattern:
Arithmetic Quilt Pattern
Modern Plus Quilt Tutorial


This week we're working on our quilt tops! It's time to lay out your quilt and then piece your quilt top! Let's dive into some tips and tricks for making this a smooth process.


For these quilts it's ideal to be able to lay out the entire quilt top at once. This means you'll probably need to clear a large amount of floor space, or clear off your design wall. If you're making a throw or baby quilt, you may even be able to lay out your quilt on a bed!

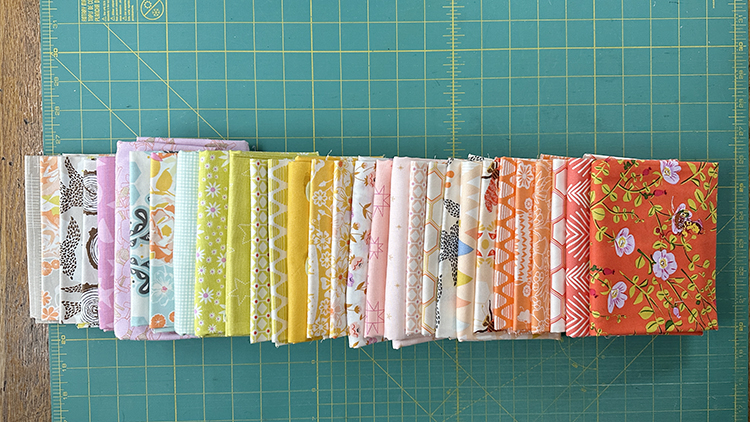
When I lay out a plus quilt, I like to use a large piece of foam board to separate all my squares by print. This makes it easy to move all the squares around the floor as I lay out the quilt. You could also use your cutting mat, or a clean cookie sheet.


Sometimes it can be tough to get a good spread of value and color in your quilt top so that it looks evenly distributed. I find taking a photograph and viewing it in color as well as in black and white can be really helpful! Oftentimes I can see right away a print that's sticking out or where I have similar colors clumped together.


Once I'm happy with my layout, I put my handmade row markers to work! I use these for nearly every quilt I make. Make your own using my tutorial: Easy DIY Row Markers for Quilting.


I like to stack the squares up in each row, then stack all my rows into one big stack of squares! Then it's time to start piecing. Chain piecing helps make quick work of these quilt tops, if you need a refresher check out my Chain Piecing Tutorial.


For even more piecing tips, check out my 8 Tips for Precise Piecing!


Ever lose track of which way you’re pressing your row seams? When I’m piecing a quilt top, I usually press my seams in one direction and alternate directions every other row. A few years ago I made a simple decision that makes my life easier: I press seams in odd numbered rows away from the row marker. I press seams in even numbered rows towards the row marker. I’ve done it this way on many, many quilts and I rarely end up with a row pressed the wrong way! Even if my rows are out of order when I do the pressing, this simple habit keeps things organized.


Pressing a quilt top isn't super high on my list of favorite quilting tasks, but I do love how good it looks when it's neatly pressed! Now it's all ready for next week!

Happy Quilting!

Plus Quilt Along Week 2

Tuesday, April 30, 2024


Welcome to week two of the Plus Quilt Along! I'll be updating the Sew Along Page each week with all the posts so that you can easily catch up or reference these posts after the sew along ends!

I hope you'll sew along with us! Sew from the tutorial or the pattern:
Arithmetic Quilt Pattern
Modern Plus Quilt Tutorial


This week we're going to work on cutting out our quilts. The cutting for these quilts is straightforward, lots of squares!

If you're working from the yardage called for in the pattern, you'll be cutting all the yardage into squares. You will have some extra squares to give you more flexibility when laying out your quilt.

If you're planning to cut from scraps, both the pattern and tutorial versions contain totals for each plus shape that appears in the quilt. Most of the quilt will be "full pluses" which are made up of five squares each. There are also partial pluses made up of four or three squares and single squares along the edges of the quilts.

If you're planning to cut your squares from stash yardage or a mix of yardage amounts, this table may be helpful to you! You can see exactly how many squares you can get from a handful of yardage types. These three square sizes are the sizes included in the Arithmetic Quilt Pattern:

Fat Eighth 1/8 yard Fat Quarter 1/4 yard 1/2 yard
2.5" squares 24 16 56 48 112
4.5" squares 8 9 16 18 72
8" squares 2 0 4 5 10


I wanted to share a few quick tips for accurate cutting. If you're a seasoned quilter, these will probably all be familiar to you, but they might be a good reminder!

Press Well
It can be tempting to skip this step, especially if you don't have any harsh fold lines in your fabric. I always regret it when I don't take the time to properly press my fabrics before I start cutting! It just makes everything easier!

Fresh Blade
When was the last time you changed your rotary blade? If you can't remember, it's probably time for a new one! Not only will you get cleaner cuts, you'll need to use less force to make those cuts.

Squaring Up
Don't forget to start cutting from a clean, squared up edge. I feel this is especially important when you're cutting strips from a piece of yardage. If you're working with the 4.5" square size for your quilt, just be careful not to trim away too much! You'll need the full 18" of your fat quarters or half yards.

Stack Strips
If you feel comfortable, stacking strips when cutting out your squares can make things go a lot faster! I try to limit my stack to four strips thick, but I'm probably more accurate when I only stack two or three!

Happy Quilting!

Plus Quilt Along Week 1

Tuesday, April 23, 2024


Welcome to the first week of the Plus Quilt Along! I'll be updating the Sew Along Page each week with all the posts so that you can easily catch up or reference these posts after the sew along ends!

I hope you'll sew along with us! Sew from the tutorial or the pattern:
Arithmetic Quilt Pattern
Modern Plus Quilt Tutorial


We're kicking off this week by choosing a quilt size (and square size) as well as fabric for our quilts! First let's look at your size options!

Choose a Quilt Size

The Arithmetic Quilt Pattern has six quilt size options and three square size options to choose from. The free tutorial is the same size as the 4.5" square throw quilt that's included in the pattern.

For quilt sizes, choose between a baby, throw, twin, double, queen, or king. Then choose your square size: 2.5", 4.5" or 8". If you'd like to use a different size square, feel free! The only thing you'll want to keep in mind is that it will change the overall size of your quilt, so you may need more/less fabric for the top, backing, and binding.

Choose Fabrics

There are so many different directions you could go in terms of choosing fabrics for this quilt! The 2.5" and 4.5" square quilts are perfect for fat quarters. For the 4.5" square quilts, you'll want to be extra careful when cutting, you'll need every bit of the fat quarter's 18" dimension!

Really bust some stash with the 8" square quilts, which use 1/2 yards (or 1/4 yard cuts).


If you'd prefer to cut from scraps or random stash, both the pattern and tutorial versions contain totals for each plus shape that appears in the quilt. Most of the quilt will be "full pluses" which are made up of five squares each. There are also partial pluses made up of four or three squares and single squares along the edges of the quilts.


I thought it would be fun to share a parade of plus quilts I've made over the years, to give you some ideas for choosing fabrics! I've made super bold and graphic plus quilts, and also subtle and soft ones. Many were made with quilting cottons, but you'll also see versions I made with flannel, double gauze, and vintage sheets. So many fabric combinations look good in this design!


Soft and Subtle Vintage Sheet Plus Baby Quilt


Sherbet Plus Throw and Baby Quilt


Geometric Bliss Plus Baby Quilt


Dreamin' Vintage Plus Baby Quilt


Sugar Plus Throw Quilt


Nordika Plus Throw Quilt


Castle Peeps Plus Throw Quilt

https://www.incolororder.com/2019/07/double-gauze-plus-quilt.html
Double Gauze Plus Quilt


Imprint Plus Throw Quilt


Folksy Flannels Plus Quilt


Giant Neutral Plus Queen Quilt

Pinterest Board

Looking for even more plus quilt inspiration? I have a whole pinterest board filled with plus and cross quilts. Find it here: Plus and Cross Quilts Pinterest Board.

What I'm Making

During the quilt along, I plan on making a larger version of the Soft and Subtle Vintage Sheet Plus Baby Quilt I made earlier this year. I have a bunch of squares leftover from making that quilt, so I thought it would be a good way to use them up. I really want to see how the subtle palette looks on a larger scale too!

Happy Quilting!

Plus Quilt Along Schedule

Tuesday, April 16, 2024


The Plus Quilt Along is a week away! I wanted to share the schedule for the quilt along so that you know what posts you can expect from me starting Tuesday, April 23rd! Each week I'll be sharing a to do list and some tips/tricks that will help you make your quilt! I've made a dedicated page for the quilt along, which I'll update with each week's post so you can follow along at any time! Here is the schedule:

Week 1 - April 23rd
To do: Choosing fabric and a quilt size

Week 2 - April 30th
To do: Cutting

Week 3 - May 7th
To do: Layout quilt and sew quilt top

Week 4 - May 14th
To do: Quilting and finishing

How to Participate:
Similar to our annual Lined Drawstring Bag Sewing Along, this is going to be casual and no-stress. Participating is easy, we'll be using the #arithmeticquilt hashtag on Instagram to share our progress. Please tag me too @jenib320, I love seeing your projects. Not on Instagram? That's okay! Feel free to quilt along and share your quilts with me via email!

Pattern & Tutorial:
Sew from the tutorial or pattern! The free tutorial is for a throw size quilt using 4.5" squares, you can find it here: Modern Plus Quilt Tutorial. The pattern has six quilt size options including baby, throw, twin, double, queen, and king. There are also three square sizes: 2.5", 4.5" or 8". So 18 different options to choose from! Find the pattern here: Arithmetic Quilt Pattern.

https://www.jenibakerpatterns.com/product/simple-addition-quilt-pdf-pattern
Shop the Pattern:
The Arithmetic Quilt Pattern is 20% off through 4/26/24. Price is already marked down, no code needed.

Happy Quilting!